To add Photos to a Gallery
|
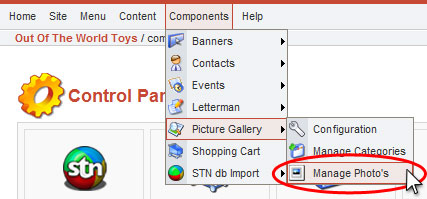
Step 1. Click Components>Picture Gallery>Manage Photo’s (sic). From here you can Upload and Edit pictures, and Publish, Unpublish or Delete them. |
|
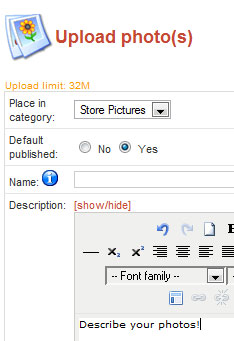
Step 2. Click Upload. This takes you to the Upload photo(s) manager. |
|
Step 3. Choose the category, name and describe your photo. Choose a category for the image to be placed into. Default is the first category. If you leave the Name field blank, the system will name your picture by its file name (e.g.: DSC0090.jpg). If you put a name in the field and upload a ZIP file, every image in the archive will have that same name. You can describe each photo using the Text Editor, and even insert images into the pictures’ descriptions.
|
|
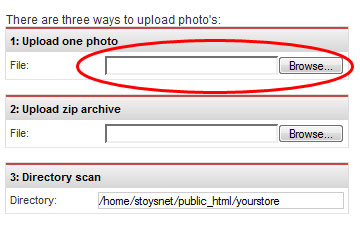
Step 4. Scroll down to the Upload fields and choose a picture Click “Browse…” to find the image on your computer.
|
|
Step 5. Click the Upload button |
|
Step 6. Press the Close button Wait til it’s stopped uploading! You should now see your new image in your picture gallery. |


