|
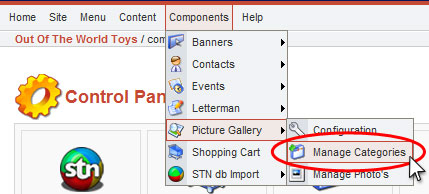
Step 1. In the back end of your site, go to Components, Picture Gallery, Manage Categories. From here you can create a new category, or edit an existing one. |
|
Step 2. Click the New button at the top right. |
|
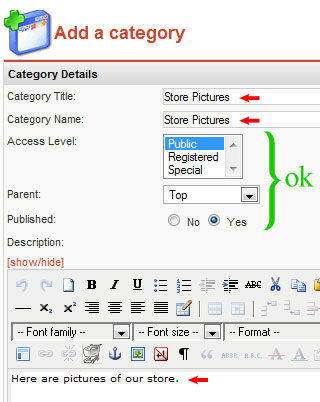
Step 3. Name your new Photo Category. You must input a Category Title, and a Category Name. These are usually the same. Write a Description of the category if you like.
Usually you’ll leave Access Level, Parent and Published alone.
|
|
Step 4. OPTIONAL: Access Level; Parent; Published. Access Level: Only change this if you want to restrict access to this photo category to Registered users (shoppers), or Special users (a user type you must create).
Parent: After you’ve made a category, you have the option of ‘nesting’ new categories inside it. For example, a new category called “Party Room” could be a subcategory of “Store Pictures.” Published: Simply turns the category on or off. You might set Published to “No” until you were finished adding all your photos and descriptions. |
|
Step 5. Hit “Save.” |


