PLEASE NOTE: If you are ALREADY USING FrameEZ, follow the instructions below. Otherwise, please refer to the help page on making your own banner graphics, as FrameEZ is discontinued.
To make a Category Icon in FrameEZ, you’ll bring in an image, apply the Category Icon frame, and scale the image to look good in the frame.
 1. Choose a picture
Say I’ve made a subcategory for Construction called Robots, and I want to make an icon to represent it.
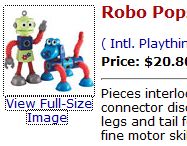
First, I’m going to get a picture of a toy I have in my online store. I just right-click on the thumbnail and download it to my desktop.
Use the small thumbnail, not the Full Size Image. You’d have to scale the big image down so much that it would become blurry.

2. Import the picture into FrameEZ
Start FrameEZ and hit the Import Image… button. Navigate to the image you just downloaded and open it.

3. Apply the Category Icon frame
Now that it’s in, click the Category Icon frame. The frame will pop in, and your image might appear to disappear. It’s just behind the frame.
Drag the image down so it’s inside the icon frame.
 4. Scale the image to fit
Click the + and – buttons at the bottom of the FrameEZ window to scale the picture inside the frame. Sometimes you might find that the icon looks better if you crop in. Experiment! It’s easy to make a new one.
 5. Save As…
Save your new Category Icon.
You’re ready to upload it and use it on your site!
6. Assign and Upload your Custom Category Icon
Instructions on uploading and using your new icon are in the Help menu under Shopping Cart; Categories; Category Icons
Or click here to see it.
